
Notice:
We used to share instructions on how to collect patient responsibility on Canvas, but with the launch of our Provider Web App - we've made it easier for Providers and their teams to collect patient payments.
Provider Web App
1. Find and click on your patient
2. Scroll down to Payment Requests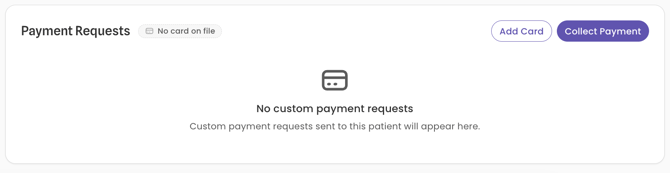
This is where you'll see if a Patient has a payment on file. We'll share instructions on how it appears if your Patient has or doesn't have a payment on file.
No Card on File
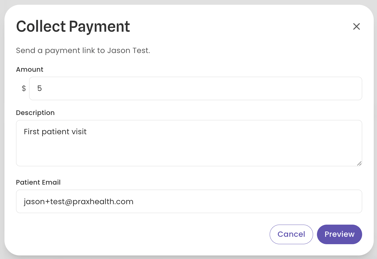
- Click Collect Payment. This will create an invoice to email to your Patient.
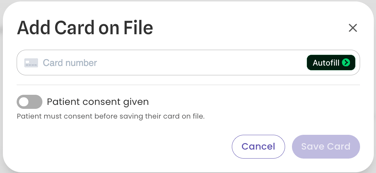
- Note: If you have access to the Patient payment card, you can instead enter by clicking Add Card and follow instructions when Card is on file.
- Enter the amount visit, description, and Patient email. Click Preview.
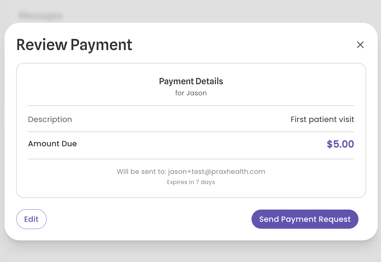
- Confirm details and then click Send Payment Request.
-
This will send the payment request to your Patient.
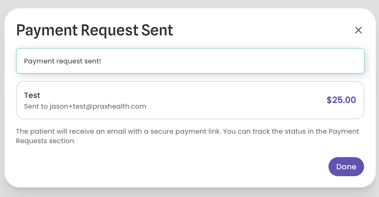
-
You can monitor on the Patient page for Payment status
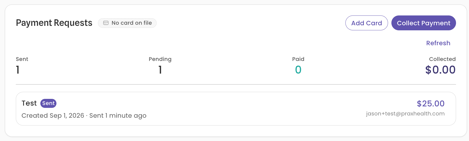
-
Your Patients will receive an email with your invoice.
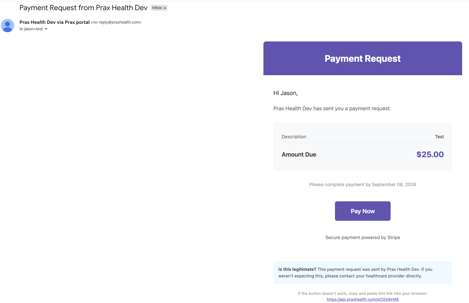
- Notes:
- Stripe invoices are only active for 7 days.
- If a Patient doesn't respond, we do recommend messaging them on the Patient profile and re-send a new invoice.
- For non-responsive Patients, check your terms on your agreement of financial responsibility.
- When your Patient pays their invoice, the patient will be emailed a receipt and a receipt will appear under Documents of the Provider or Provider's staff that charged the card.
Card is on File.
-
When you or a patient registers their payment card, you'll see a Card of file badge.

-
Click Collect Payment
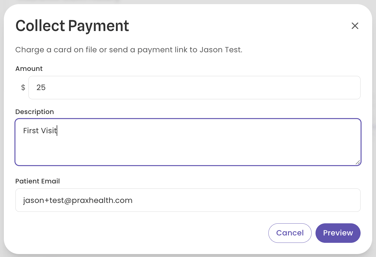
- Enter the amount visit, description, and Patient email. Click Preview.
- Confirm details and then click Charge Card.
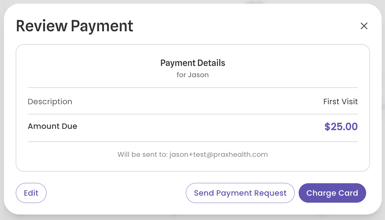
- The Patient's card will be charged with an emailed receipt sent to your Patient and a receipt appearing under Documents of the Provider or Provider's staff that charged the card.
Associating charges to visits
If you worked with our team to create self pay fees, then after you sign your chart using the respective structured assessment, you'll learn that after 11 am central that the patient's profile shows a visit
When you collect payment, you'll see that you have the ability to select a visit: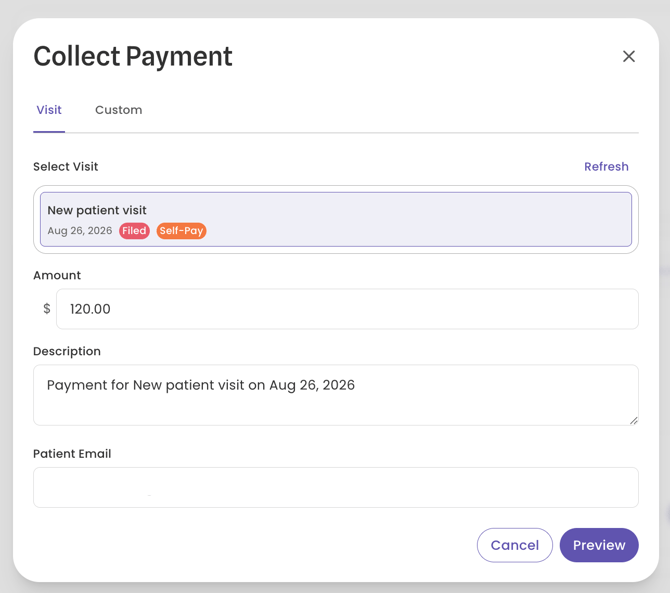
-
Note: You have the ability to select multiple visits you're collecting for more than one visit.
Creating custom charges
This is ideal for situations where you may want to charge for no-show fees, late fees, memberships, or other services
-
Click Collect Payment
- Instead of Visit, select Custom
- Enter details like mentioned earlier and submit payment request or collect payment
Failed Transactions
Stripe will tell you if a Patient's card declines when you log into your Stripe dashboard. Reference.
In these events, we recommend you do one of two things:
- Message the patient directly on the Prax Web App or Canvas
or - Send the invoice to your patient as a Send Payment Request
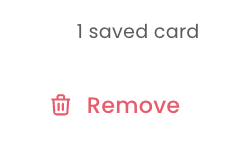
Patients have the ability to change their payment card on their profile, but you can also remove the saved card.
Note: As a reminder, Stripe invoice links are only active for 7 days. If the Patient doesn't pay by then, you'll want to continue communication with the Patient and resend the invoice link.