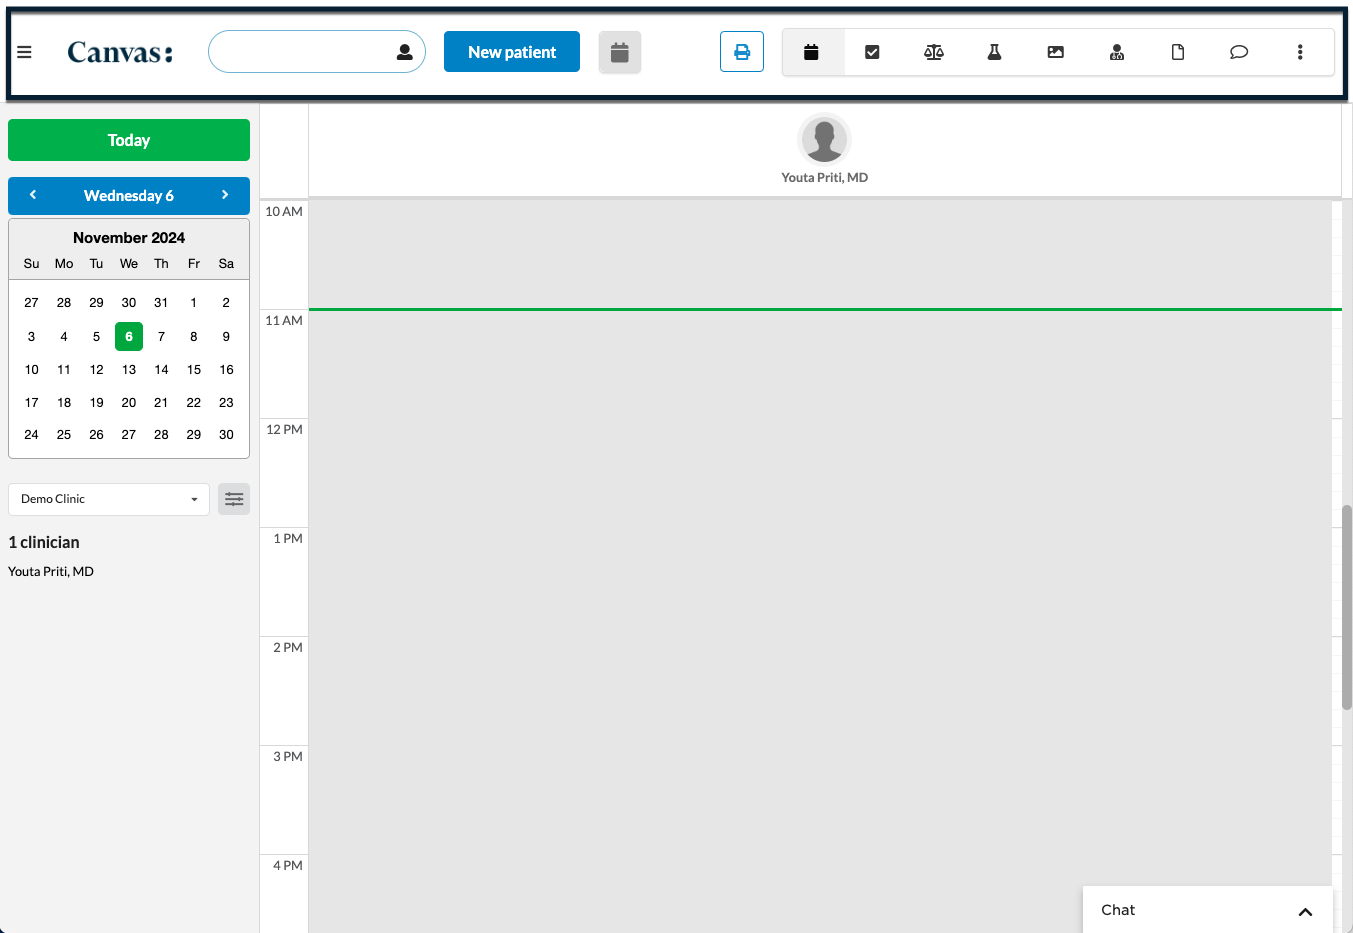
The Schedule View is the home screen or default window, that will appear once you have logged into Canvas.
Home Screen Orientation
Upon logging into Canvas, the user will land on the Schedule View. By default, this view displays all appointments for all providers on the current day
Task Bar
The task bar is a quick way to navigate various areas of Canvas
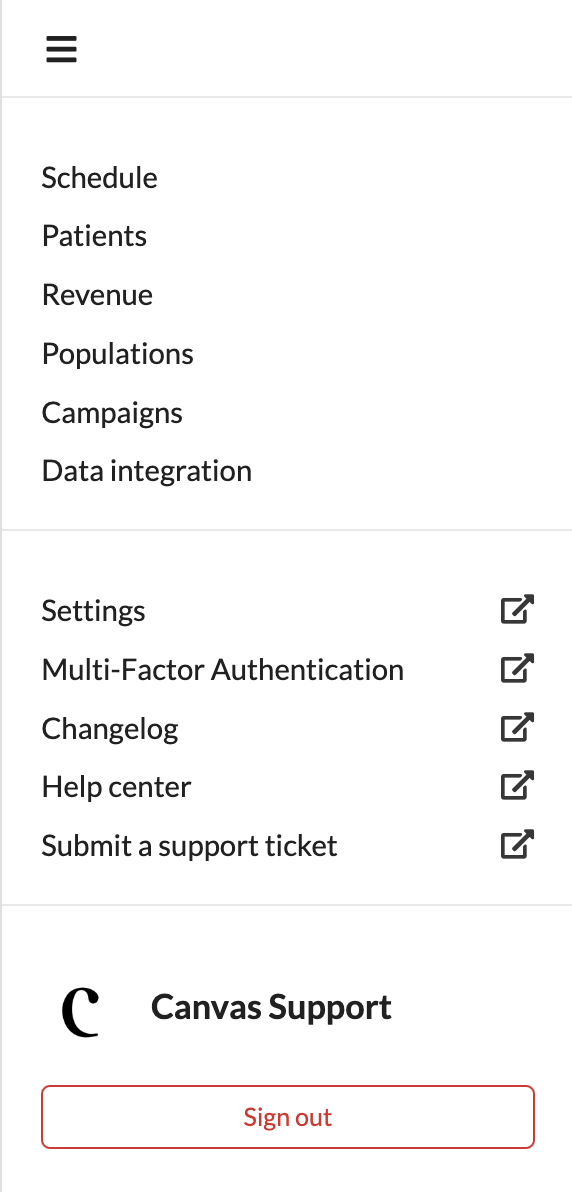
Triple Line Menu
The triple line menu, also called the "Hamburger menu," is a central navigation point commonly accessed by Admins. While it provides essential administrative settings, it also houses a range of other features and configurations accessible to various user roles, making it a versatile tool within the system.
Logo
Clicking on the customer's logo offers a quick shortcut to return to the Schedule View. This logo is displayed consistently across all pages in Canvas, making navigation easier and more efficient.

Patient Search
Use the patient search bar to quickly locate patients and navigate directly to their charts. This tool streamlines access to patient information from anywhere in Canvas.

Patients can be searched by:
-
Demographics
-
Name: full name, first name, last name or partial name
-
Medical Records Number (MRN)
-
Date of birth (MM/DD/YYYY)
-
10 or 7 digit phone number (no special characters)
-
Email
-
-
External Identifier
-
Add an exclamation point
!prior to identifier (!abc1234)
-
-
Inactive Patient
-
Search for patient as described above
-
Click
No active patients found. Search all patients.to display inactive patients -
Click desired inactive patient
-
New Patient Button
As new patients come to the practice, they can be added by clicking the New Patient button. This allows staff to enter essential information and create a new patient record in the system.

Required information for creating new patients
-
First Name
-
Last Name
-
Date of Birth
-
Sex at Birth
-
Phone number
Best practice is to complete the patient’s profile with full demographics, address, and contact information when possible. Review Patient Demographics for further details.
Calendar Button
Clicking the icon opens the scheduling modal and scheduling a new appointment for a patient.

Print Button
Clicking the icon opens the print window, allowing the current schedule view to be printed directly. This provides a convenient way to create a hard copy of the day’s appointments.

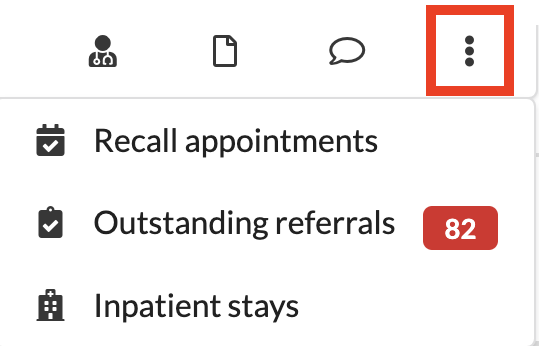
User Panel
Each user has a personal "inbox" within the Schedule View referred to as the user panel. This inbox notifies the user of any outstanding items assigned to them directly or to any team they belong to. It serves as a centralized location for tracking tasks and ensuring timely follow-up on action items.

-
The user panel consists of:
-
Tasks
-
Refill requests
-
Lab results
-
Imaging results
-
Consult reports
-
Patient messages
-
Uncategorized documents
-
Triple dot menu
-
Recall appointments
-
Outstanding referrals
-
Inpatient stays
-
-
Provider Schedule
The Schedule view's default presentation displays all providers' schedules for the current day. This view can be customized by applying filters to show specific schedules that meet various criteria.
The appointment times displayed in the schedule view automatically adjust to match the timezone of the user's device.
Schedule Filters
The left side of the schedule allows the user to view various days, weeks or months of the schedule. It also can be filtered to view a certain location or provider(s).
Calendar
The calendar allows users to navigate through different timeframes by day, week, or month. The Today button always returns the user to the current day. The button is green when on the current date and unfilled when viewing another day. The blue date button lets users move forward or backward by one day at a time. Additionally, clicking directly on the left or right side of the month in the calendar will quickly move the user to the previous or next month.

Locations
The location dropdown adjusts the schedule availability for providers based on the selected practice location. When a specific practice location is chosen, gray sections within a provider's availability window indicate the provider is already scheduled at another location. Selecting All Locations combines all practice locations into a single view, displaying appointments booked across all locations

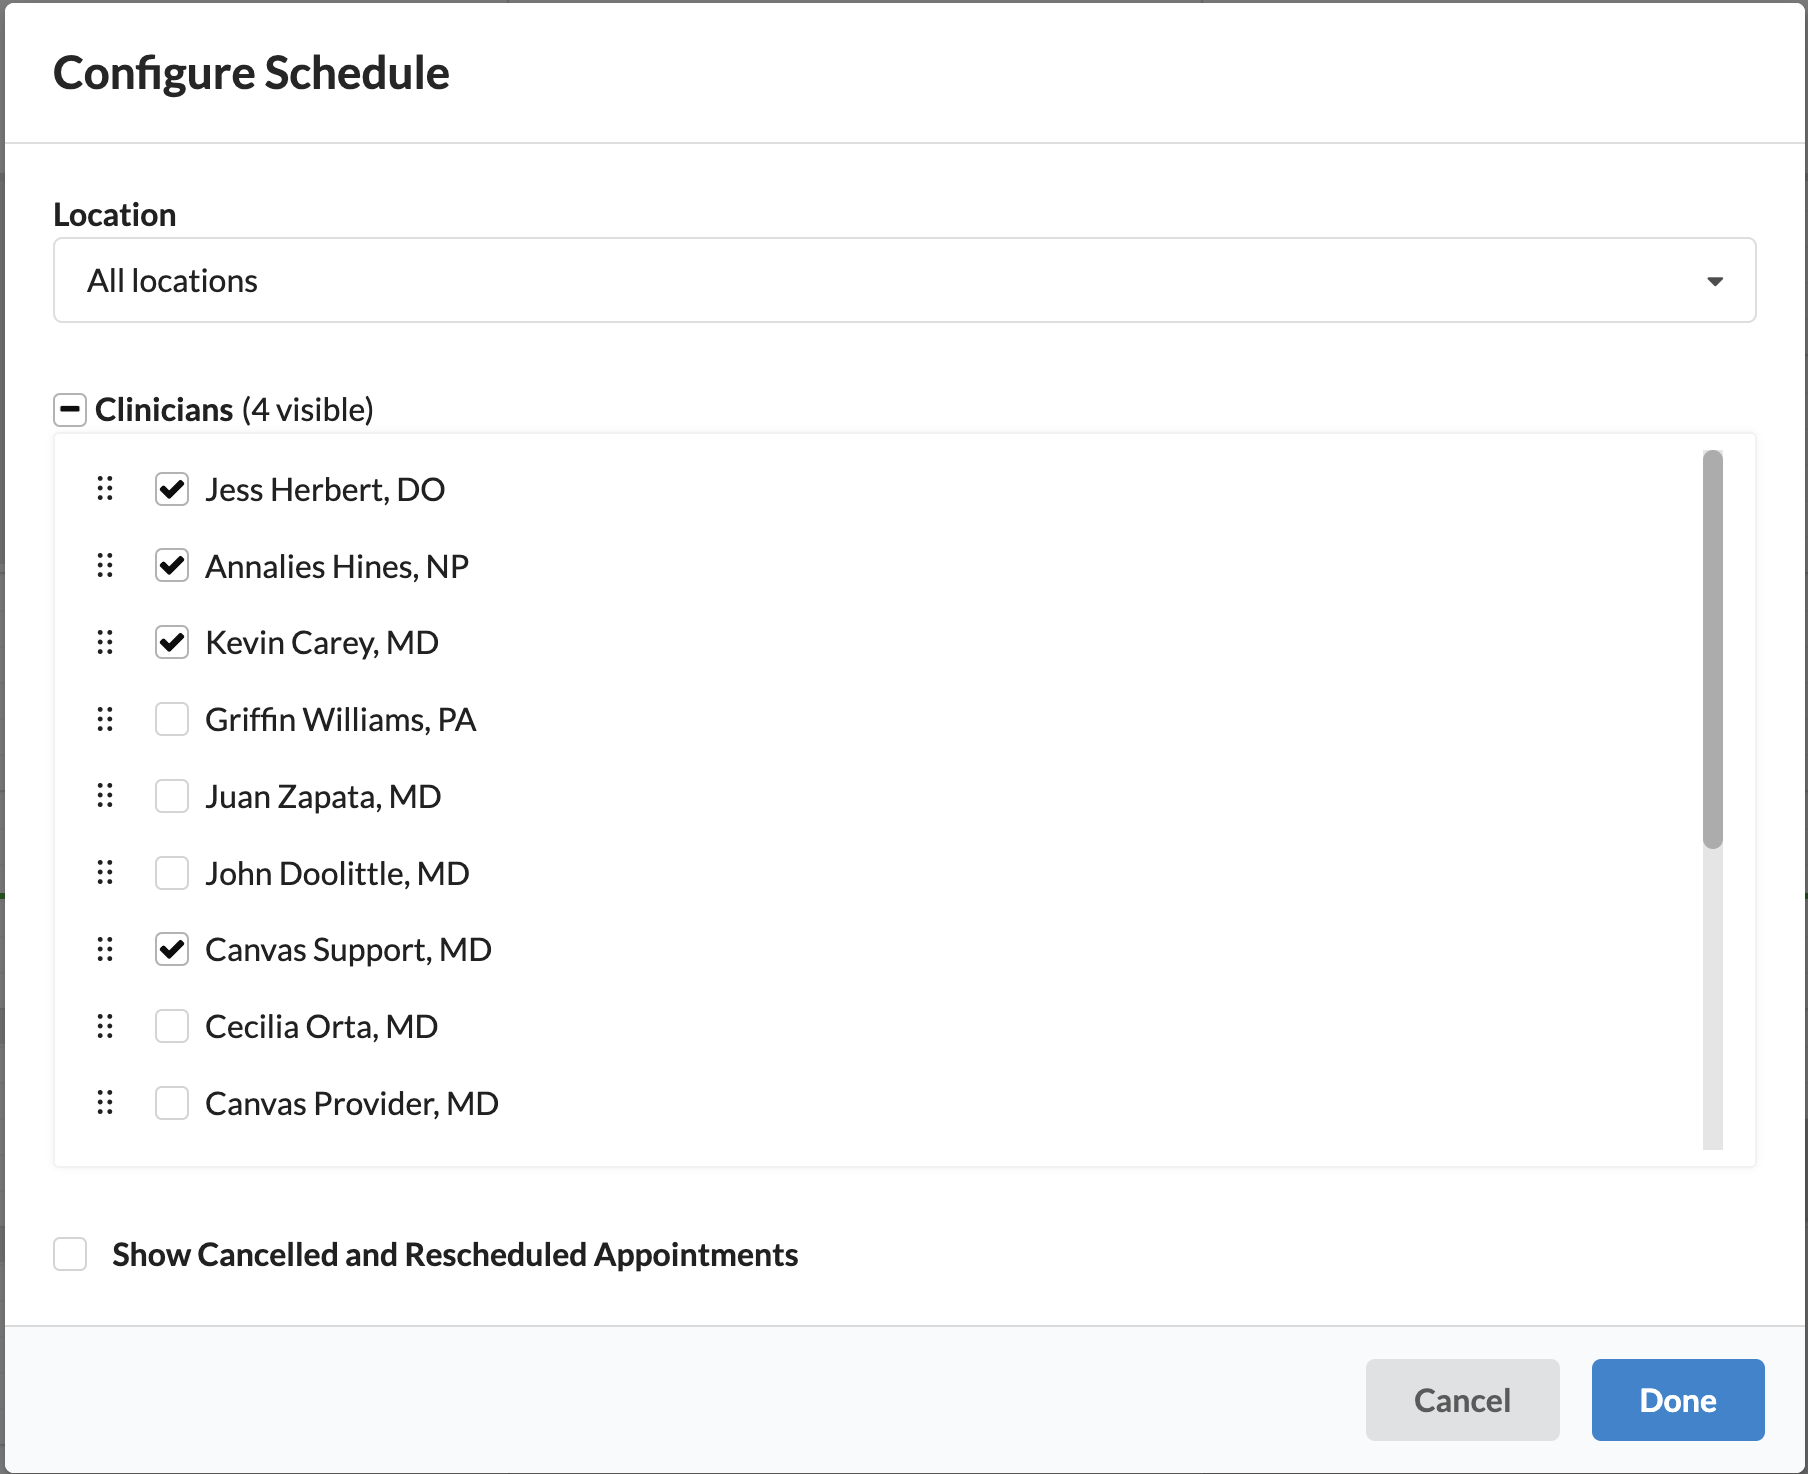
Filter and Sorting
The schedule view can be customized to suit individual preferences, ensuring efficiency and consistency across sessions. By using the Filter and Sorting button next to the location dropdown, users can access the Configure Schedule modal to select and reorder providers for each location. These settings are user-specific and persist, so the chosen providers will always display when returning to the schedule view.
-
Location-Specific Settings:
-
The location dropdown within the modal allows configuration for individual locations.
-
Multiple locations can be updated in one session without needing to save changes between adjustments.
-
-
Provider Selection:
-
Users can choose which providers appear in the schedule view by checking or unchecking boxes next to their names.
-
Checked boxes include providers in the view; unchecked boxes hide them.
-
-
Drag-and-Drop Reordering:
-
Use the triple-dot icon next to each provider's name to reorder them within the schedule view.
-
-
Show Cancelled and Rescheduled Appointments
-
Checking the box will show cancelled and rescheduled appointments will show in the schedule view
-
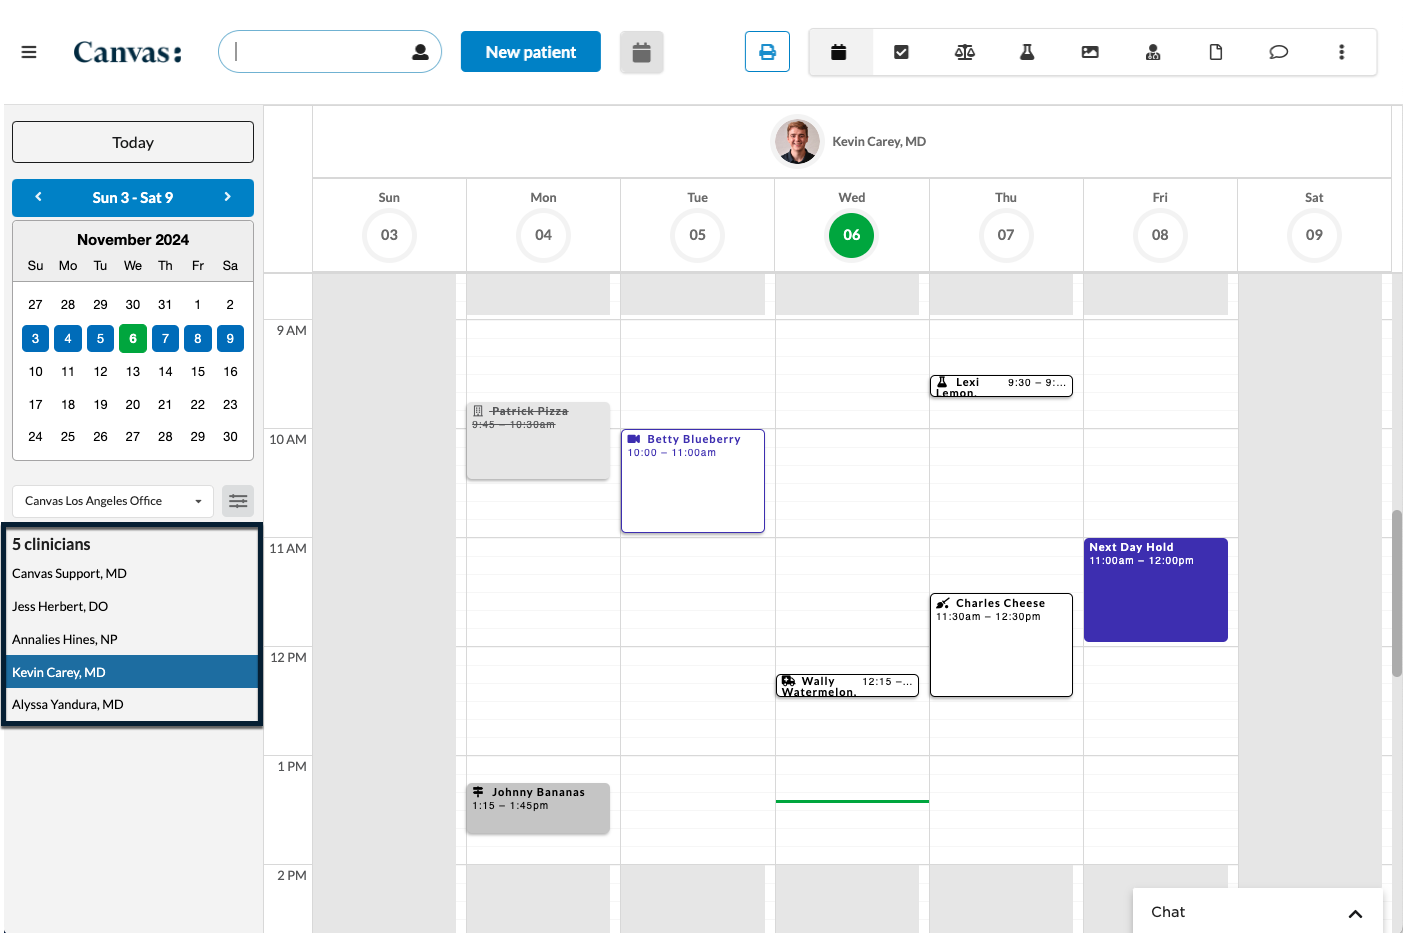
Provider's Weekly Schedule View
When an individual provider is selected from the Clinician list or by clicking on their image on the schedule, the view will shift to display that provider's schedule for the week. By default, the week view shows Monday through Friday, but there a setting in Constance: Config called ENABLE_SCHEDULE_FULL_WEEK that displays a providers full 7-day rather than five when enabled.
📄 Managing Appointments to learn how to schedule appointments